





How to Make Your Kitchen Counters Clutter-Free and Functional
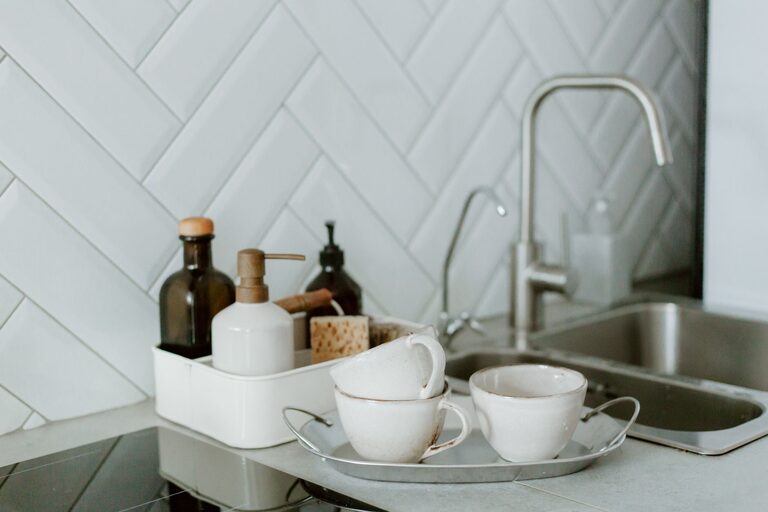
Keeping your kitchen counters clutter-free is a common goal for many homeowners. A clean and organized countertop not only makes your kitchen look more inviting but also creates a more efficient cooking and preparation area. Whether your kitchen is small or spacious, a clutter-free counter can dramatically improve your daily routine.
In this post, we’ll explore practical methods to reduce countertop clutter, maximize storage, and maintain a tidy kitchen surface.
Why Keep Kitchen Counters Clutter-Free?
Before diving into the tips, it’s helpful to understand why a clutter-free kitchen counter is beneficial:
– Improved Efficiency: Clear surfaces give you more space to prepare meals comfortably.
– Easier Cleaning: Without many objects, wiping down counters is quicker and more effective.
– Visual Appeal: An organized space feels calming and welcoming.
– Hygiene: Fewer items reduce places where dust and crumbs can accumulate.
Now, let’s look at how to achieve this.
Step 1: Clear Everything and Assess
Start by removing everything from your countertops. This step gives you a blank slate and helps you see what you really use daily versus what just takes up space.
How to Assess Items:
– Essential Daily Items: Items you use every day, like a coffee maker or knife block.
– Occasional Use Items: Appliances or tools used once in a while.
– Unnecessary Items: Things that don’t belong in the kitchen, duplicates, or rarely used gadgets.
Ask yourself: Do I need this on the counter? If not, consider storing or donating it.
Step 2: Maximize Cabinet and Drawer Storage
One of the biggest reasons counters get cluttered is lack of storage. Take advantage of every inch inside cabinets and drawers.
Tips to Maximize Storage:
– Use stackable shelves inside cabinets to layer items.
– Add drawer organizers to keep utensils and tools neatly separated.
– Install pull-out racks or baskets for easy access to pots, pans, and pantry goods.
– Consider cabinet door organizers for small items like spices or cutting boards.
Relocate items currently on countertops that can fit in these storage spaces.
Step 3: Utilize Vertical Space
If counter space is limited, think vertical.
Ideas to Use Vertical Space:
– Hang a magnetic knife strip on the wall instead of using a bulky knife block.
– Use wall-mounted racks or pegboards to store frequently used utensils or pots.
– Install floating shelves for decorative or functional items like cookbooks, jars of ingredients, or dishware.
Vertical storage frees up countertop space while keeping essentials within reach.
Step 4: Choose Multi-Functional Appliances and Tools
Some kitchen gadgets take up a lot of space but are rarely used. Simplify by choosing appliances that combine multiple functions.
Examples:
– An Instant Pot that works as a pressure cooker, slow cooker, and rice cooker.
– A blender with food processor attachments.
– Compact, stackable measuring tools.
Reducing the number of single-use appliances helps keep counters tidy.
Step 5: Designate Stations for Common Tasks
Creating specific zones on your countertop helps organize items and reduces random clutter.
Suggested Stations:
– Coffee Station: Coffee maker, mugs, and accessories in one area.
– Prep Station: Cutting board, knives, and frequently used utensils.
– Baking Station: Mixing bowls, measuring cups, and baking ingredients.
Limit each station to only what’s needed. Store the rest elsewhere.
Step 6: Store Away Small Items
Many small items tend to accumulate on counters unintentionally.
Small Things to Store:
– Mail and keys — use a wall-mounted organizer or bowl near the kitchen entrance.
– Cookbooks — keep on shelves or in a designated cabinet.
– Spices — store in a spice rack inside a cabinet or on a wall-mounted shelf.
– Paper towels — consider a mounted holder under a cabinet.
By keeping small items off counters, you drastically reduce visual clutter.
Step 7: Use Clear Containers and Labels
When countertop storage is necessary, use clear containers to keep things neat.
Benefits of Clear Containers:
– Easy to see contents at a glance.
– Uniform containers stack neatly and look organized.
– Labels help everyone in the household know where things belong.
Store dry goods like flour, sugar, pasta, or snacks in these containers instead of their original packaging.
Step 8: Limit Decor and Only Display What You Love
While a few decorative items can make your kitchen feel cozy, too many can create clutter.
Keep Decor Simple:
– Limit to one or two small plants or a bowl of fresh fruit.
– Use decorative jars or canisters that double as storage.
– Avoid accumulating small trinkets or knick-knacks on counters.
The goal is to keep counters functional and visually open.
Step 9: Establish a Daily Quick Clean Routine
Maintaining clutter-free counters requires daily effort, but it can be quick.
Daily Habits:
– Wipe down counters after each meal.
– Put away dishes immediately after washing.
– Return items to their designated storage spots.
– Remove any trash, mail, or other items that don’t belong.
A few minutes each day keep clutter from building up.
Step 10: Deep Clean and Reassess Monthly
Once a month, spend some extra time doing a deeper clean and organizing session.
– Wipe down walls, backsplashes, and appliances.
– Reassess what’s on the counters—remove anything unnecessary.
– Rotate seasonal items; store away seldom-used gadgets until needed.
Regular maintenance prevents clutter from returning.
—
Final Thoughts
Making your kitchen counters clutter-free doesn’t require a full remodel or expensive gadgets. With intentional organization, smart storage solutions, and daily habits, you can enjoy a clean, functional kitchen workspace that inspires cooking and gathering.
Start small by clearing one section of your counter today and take it from there. A clutter-free kitchen is well within reach!